
Message Center: Drafts, Templates and Signatures
The message composer is where you write every message, whether you start it with Compose on the Messages page or from an order, event or purchase order (see Message Center: Send from an Order, Event or Purchase Order).
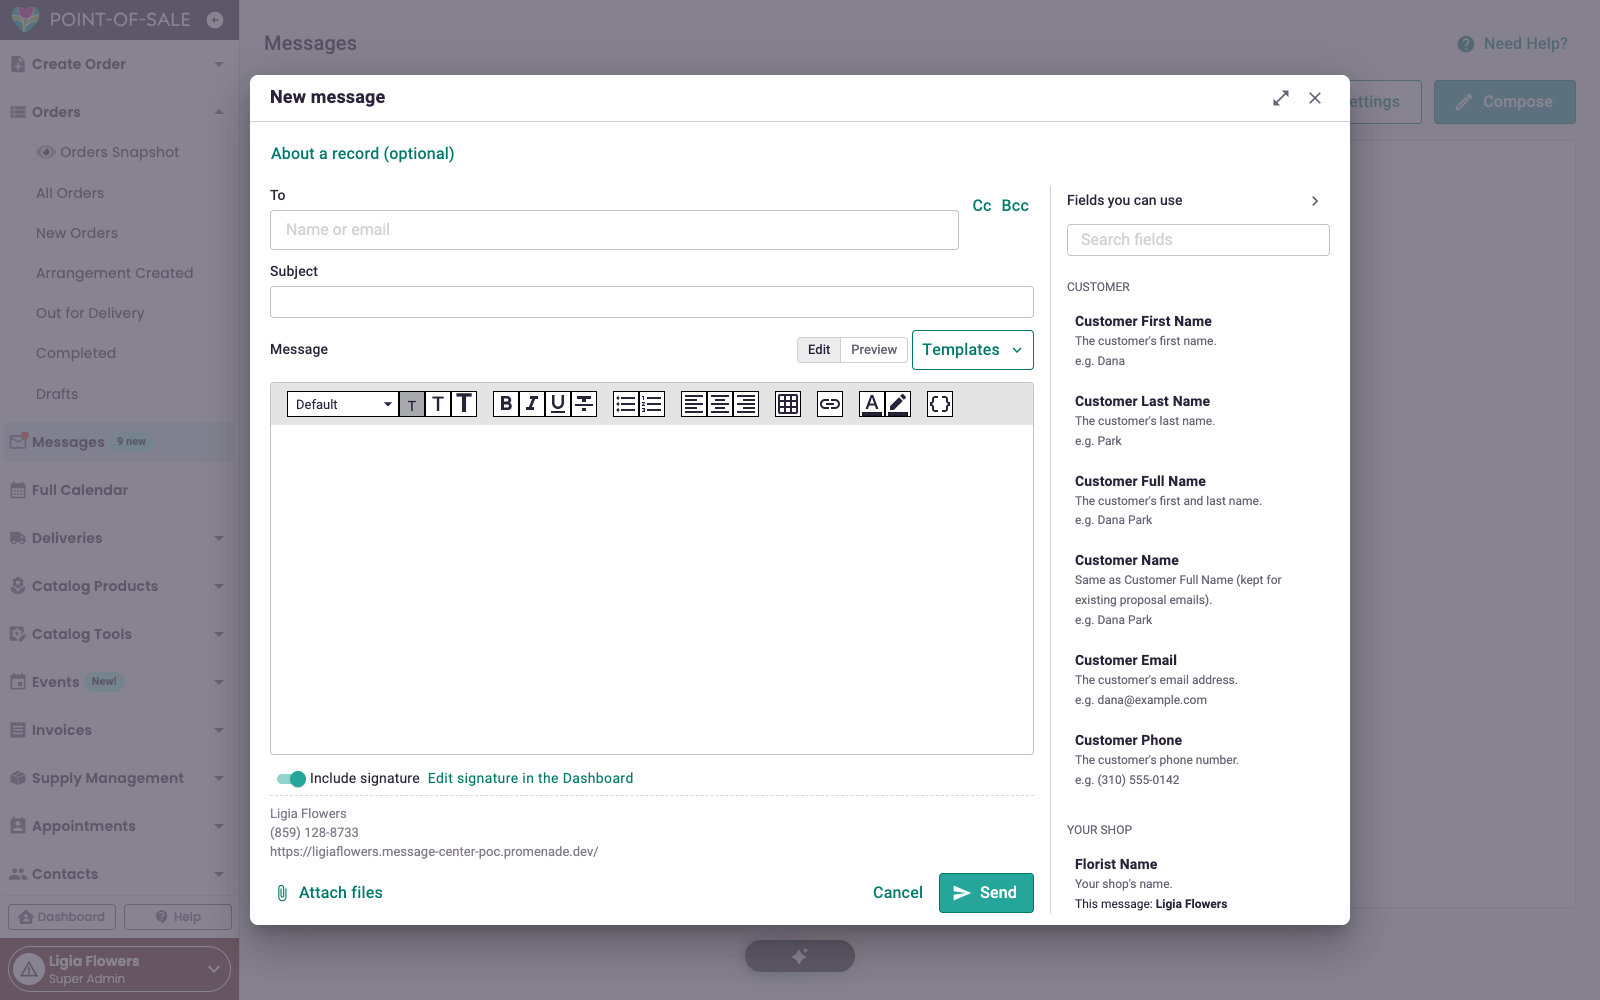
Drafts Save Automatically
As you type, your message is saved as a draft. You'll see Saving… and then Draft saved with the time at the bottom of the composer.
- Close the composer at any time and pick up later: on the Messages page, choose Drafts from the All messages menu.
- Drafts are yours. Other employees don't see your unsent drafts.
- To throw a draft away, click the trash can next to Draft saved.
If you have the same draft open in two windows, the newest version wins and you'll see a note telling you it was reloaded.
Attachments and Images
Click Attach files to add a file from your computer, or Insert from Asset Manager to use a photo you've already uploaded to BloomNation.
When you add files you can choose:
- Insert in message: images appear inside the email, and other files are attached.
- Attach as file: everything goes in the attachment list.
Files are checked for viruses. A file that fails the check is blocked and can't be sent.
Email Templates
Templates save you from retyping the messages you send often, like a delivery confirmation or a wedding consultation follow-up.
Using a template
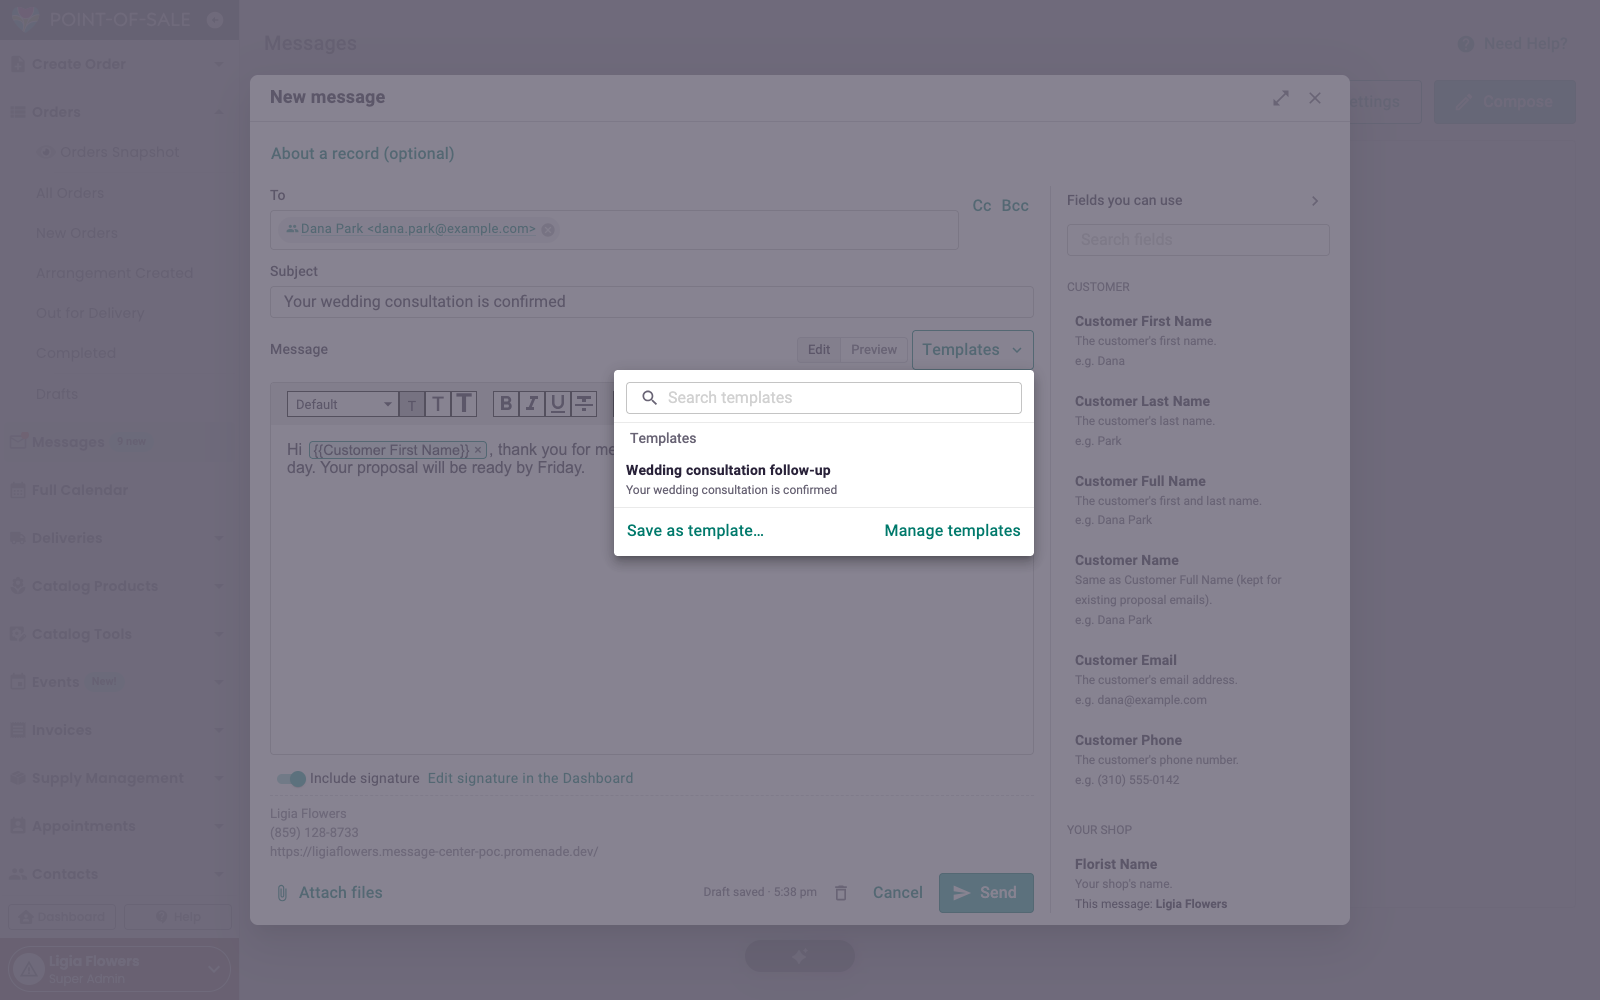
- In the composer, open the Templates menu.
- Search, or browse by Recently used and Recently updated.
- Pick a template. Its subject and message fill in, ready to edit.
Saving a template
- From any message you're writing, choose Save as template, give it a name and, if you like, add Template tags to keep your library organized.
- Or manage all your templates in Messages > Settings > Templates (Email templates in the Dashboard), where you can create, edit, search and delete them.
Saving, editing and deleting templates needs the Message Center settings permission. Everyone with Message Center access can use your saved templates. See Message Center: Employee Permissions.
Don't see templates? Templates are being turned on shop by shop. Contact support to turn them on.
Fields
Fields fill in details from the order or event for you, like the customer's name or the delivery date.
- Open the Fields you can use panel on the right of the composer (or click Insert field).
- Search the list and click a field to add it. It shows in your message as a highlighted chip, like {{Customer First Name}}.
- Click Preview to see the message with the real values filled in.
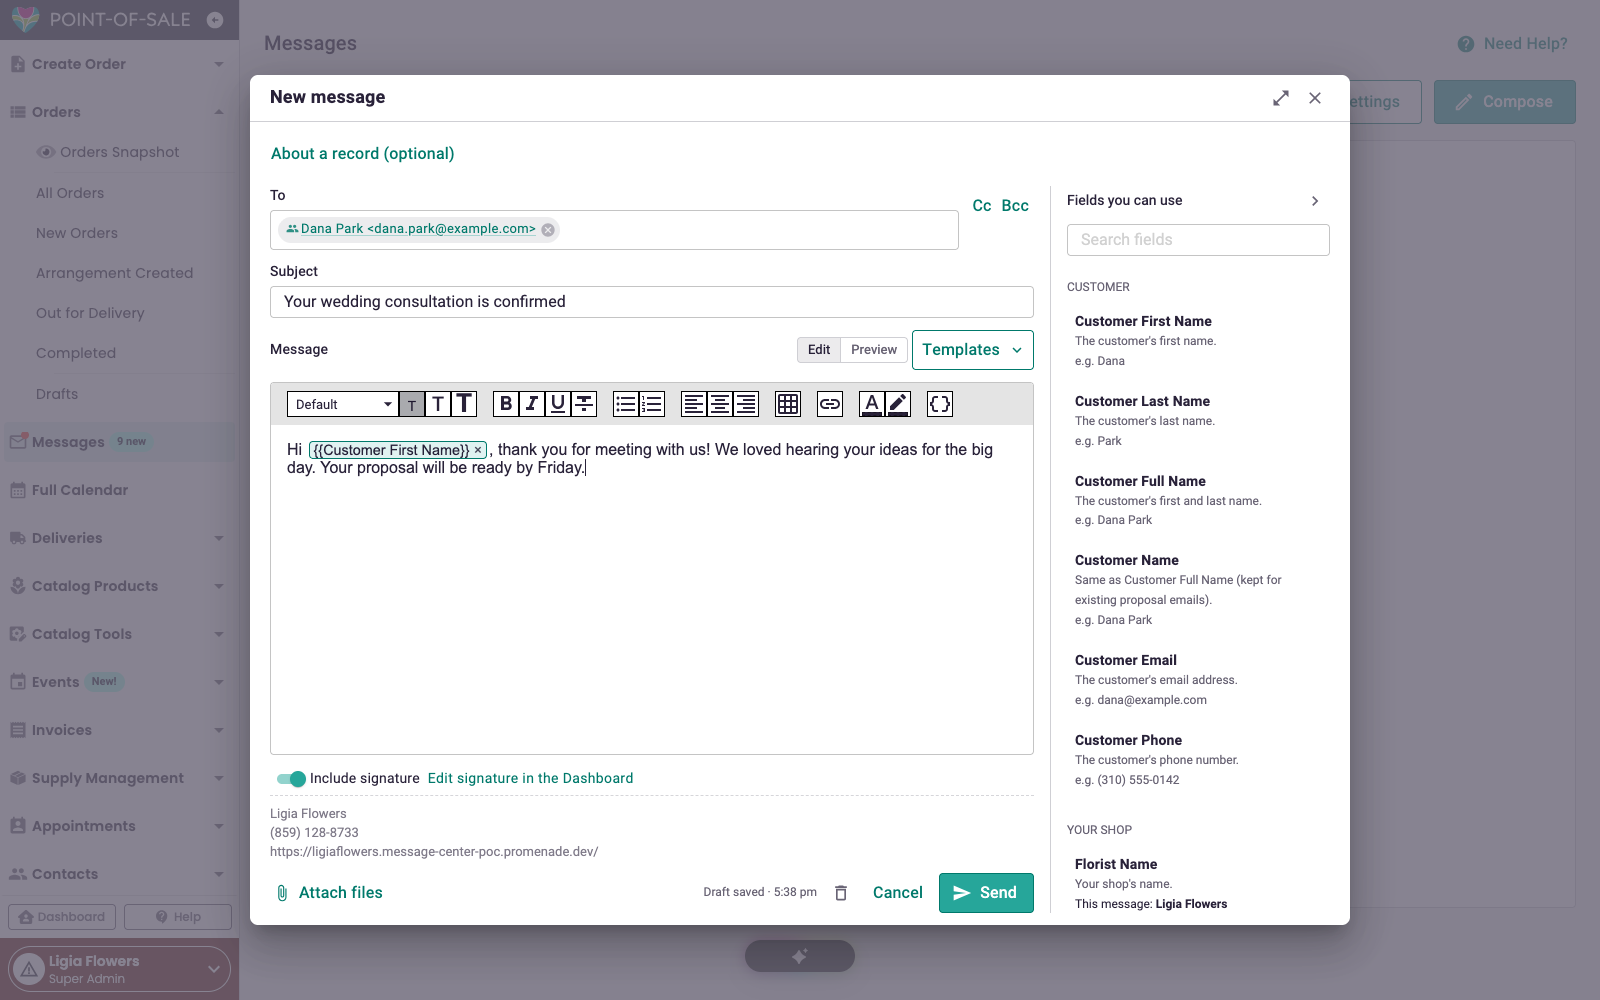
If a field has no value for this record (for example, no delivery date yet), it would go out blank, so the composer tells you which fields are empty and lets you fix them before sending.
Your Shop Signature
Your signature is added under every message your team sends, with your logo, contact details or anything else you'd like.
The signature is off until you turn it on.
Turning on your signature
The signature is set up in the Dashboard:
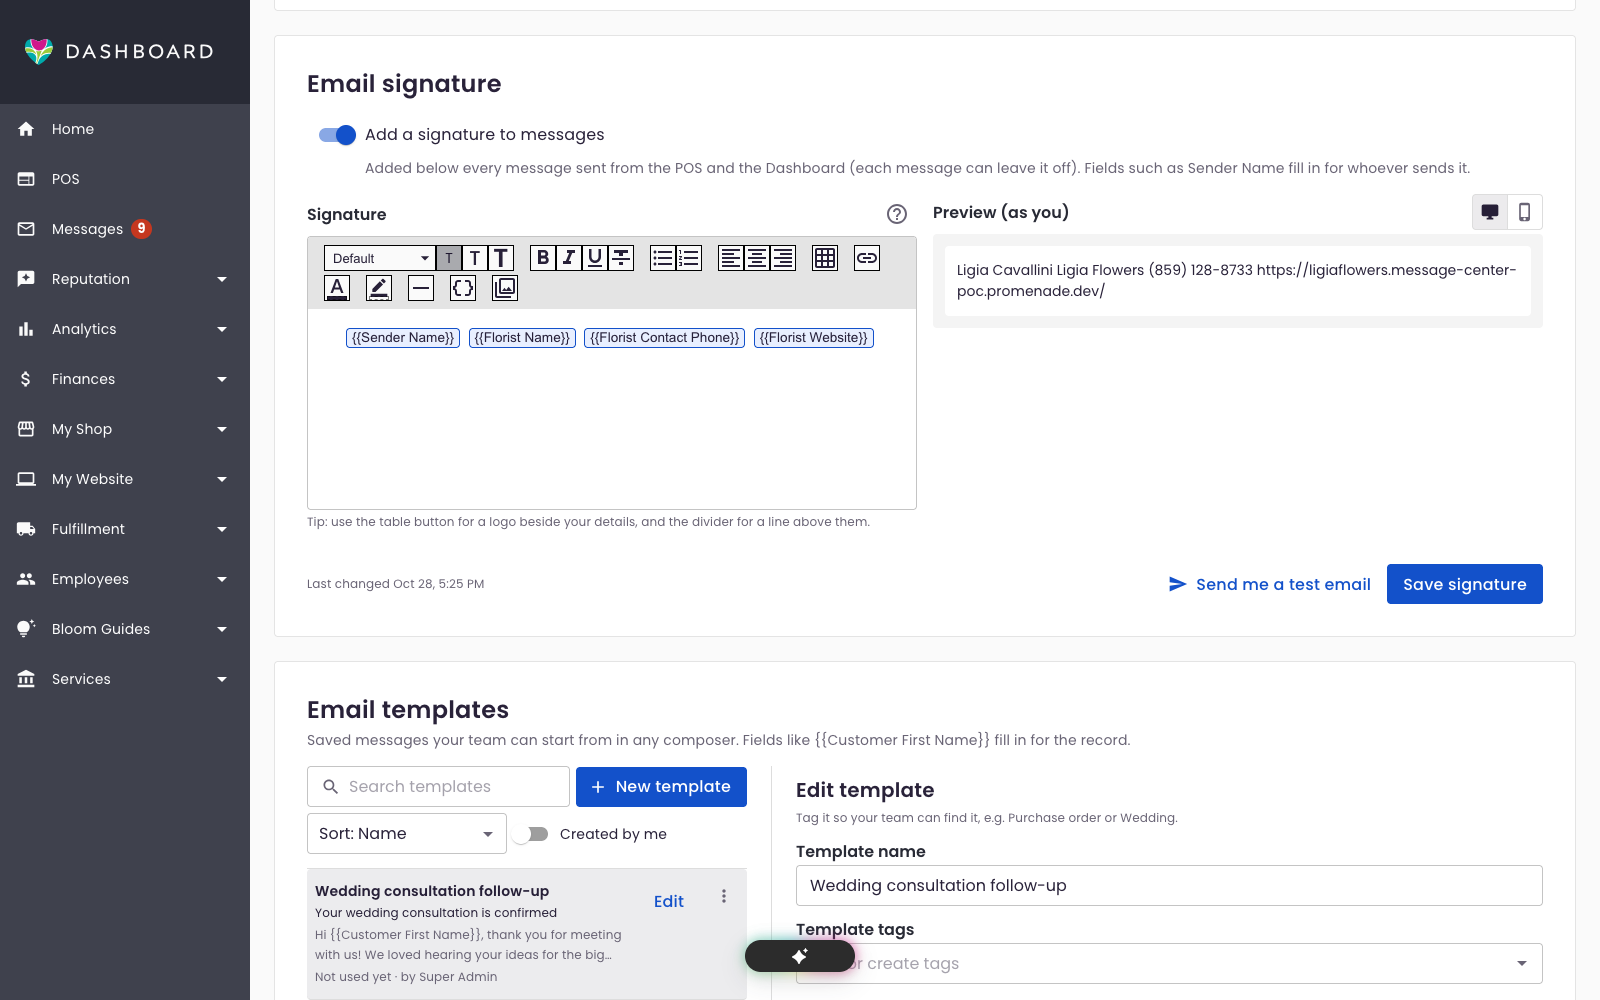
- In the Dashboard, go to Messages > Settings. (From the POS composer, click Edit signature in the Dashboard.)
- Under Email signature, switch on Add a signature to messages.
- Edit the signature. We start you off with your shop name and contact details. You can add fields and images from the Asset Manager.
- Check the preview at Email width and Phone width, and send yourself a test email.
- Save.
Changing the signature needs the Message Center settings permission.
Go to Message Center Settings →
Leaving the signature off one message
In the composer, the signature appears as a preview below your message. Switch off Include signature to send that one message without it.