
Hypertickets: Designing Your Ticket
Overview
Build a ticket that shows exactly what your team needs, laid out the way your shop works. The hyperticket editor lets you add order details, arrange them on your paper, and check them against sample orders before anything prints.
How to design your hyperticket
-
In your Dashboard, go to My Shop > Hypertickets.
-
Click Edit next to a ticket, or create a new one. See Hypertickets: Getting Started.
-
Click ⚙ to set your paper size, orientation, margins, and default font.
-
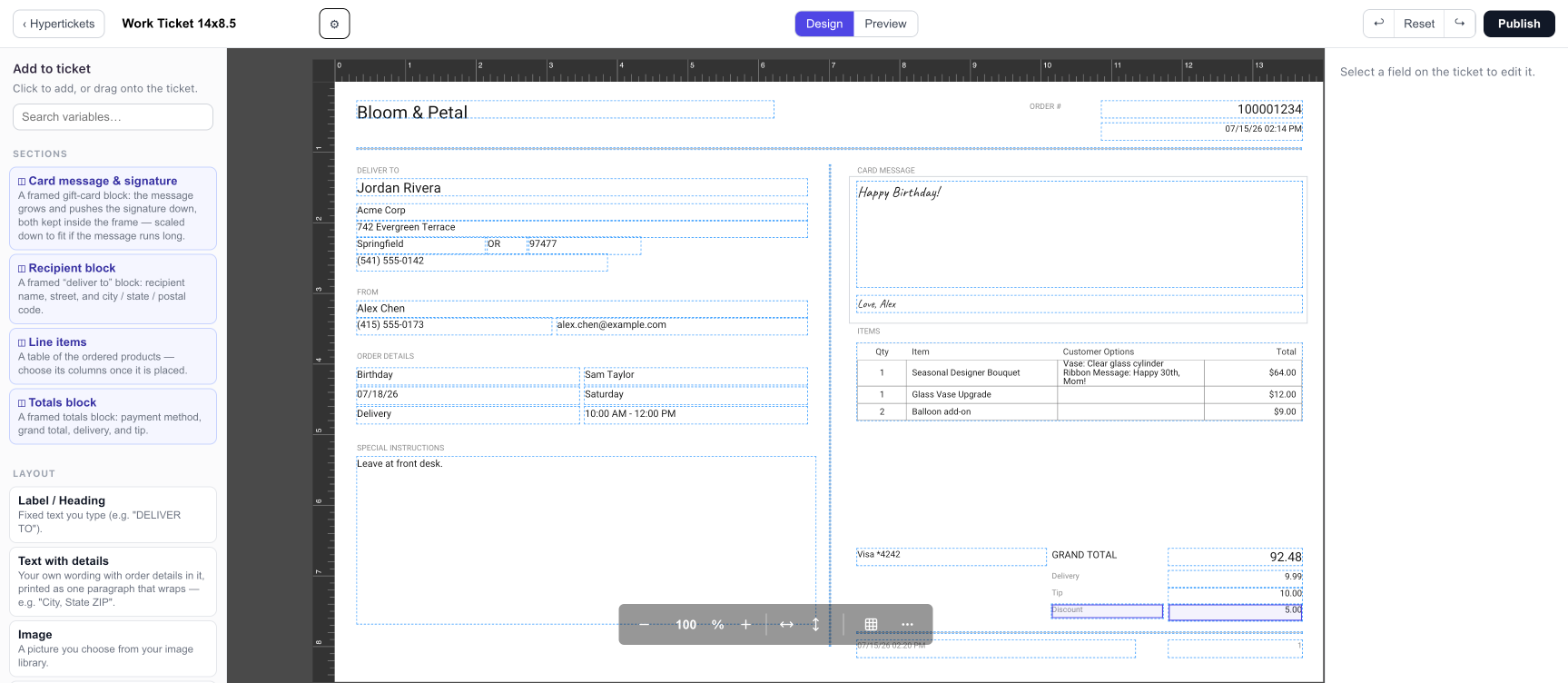
Add fields from the left panel. Click a field to add it, or drag it onto the ticket.
-
Click any field on the ticket to change how it looks in the right panel.
-
Click Preview to check your ticket with sample orders.
-
Click Publish.
Ticket settings
Set these first so your fields land in the right place. Click ⚙ next to the ticket name.
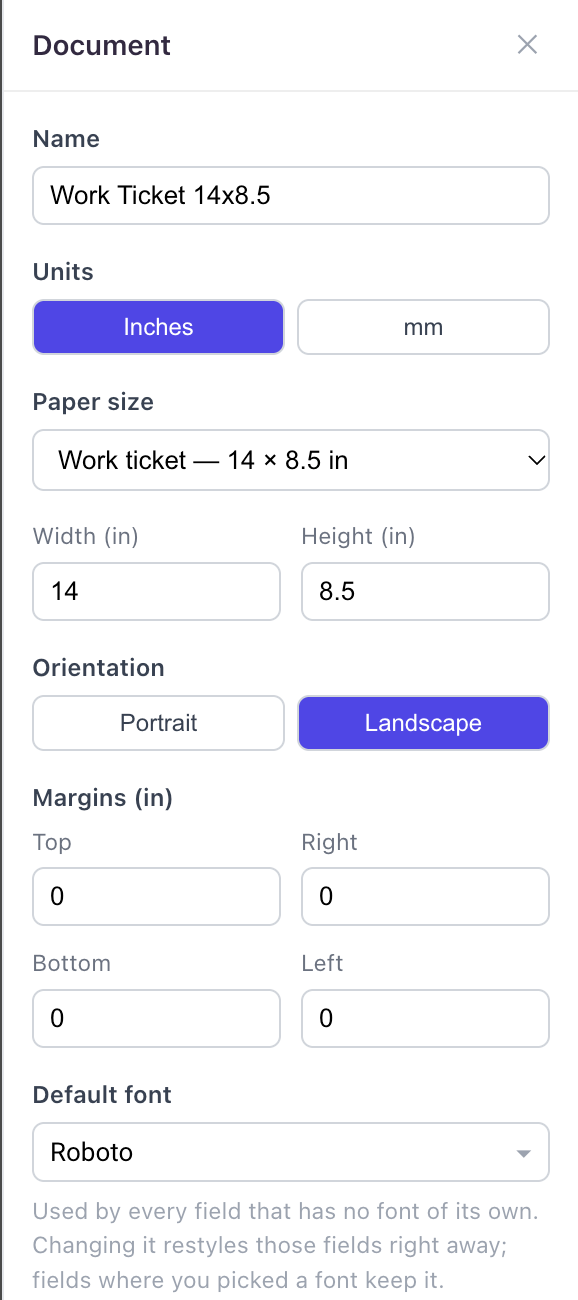
- Paper size: pick a standard size, or enter your own width and height
- Orientation: Portrait or Landscape
- Margins: print a test page first to see where your printer stops
- Default font: used by every field that doesn't have its own font. Changing it updates those fields right away
- Perforations (tear lines): mark where your paper tears. They show while you design but never print
Add fields
Everything you can add is in the left panel. Type in Search variables to find a field by name.
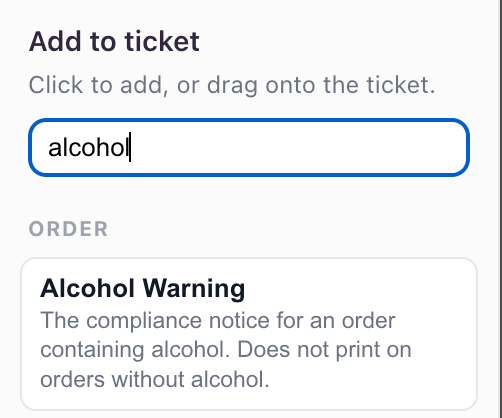
- Sections: ready-made blocks for the card message, recipient, line items, and totals
- Layout: labels, your own text, images, dividers, tear lines, and section frames
- Order details: your shop, recipient, sender, order, items, totals, events, and contacts, plus order and video QR codes
Each field fills in from the order when the ticket prints. The text you see while designing is sample text.
Fields that print only when needed
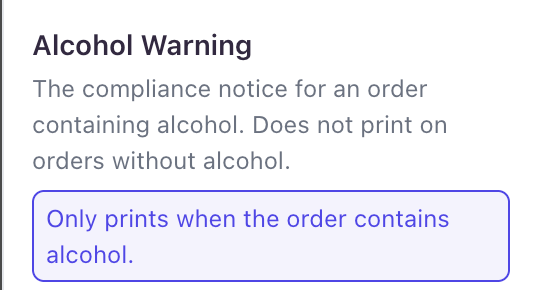
Some fields print only when they apply, like the alcohol warning, event details, and reprint notice. A purple note at the top of the field's settings tells you when it prints.
Add a More Pages Notice to long tickets. It prints only on pages that have another page after them, so your team knows to look for the rest of the order.
Change how a field looks
Click a field on the ticket to open its settings.
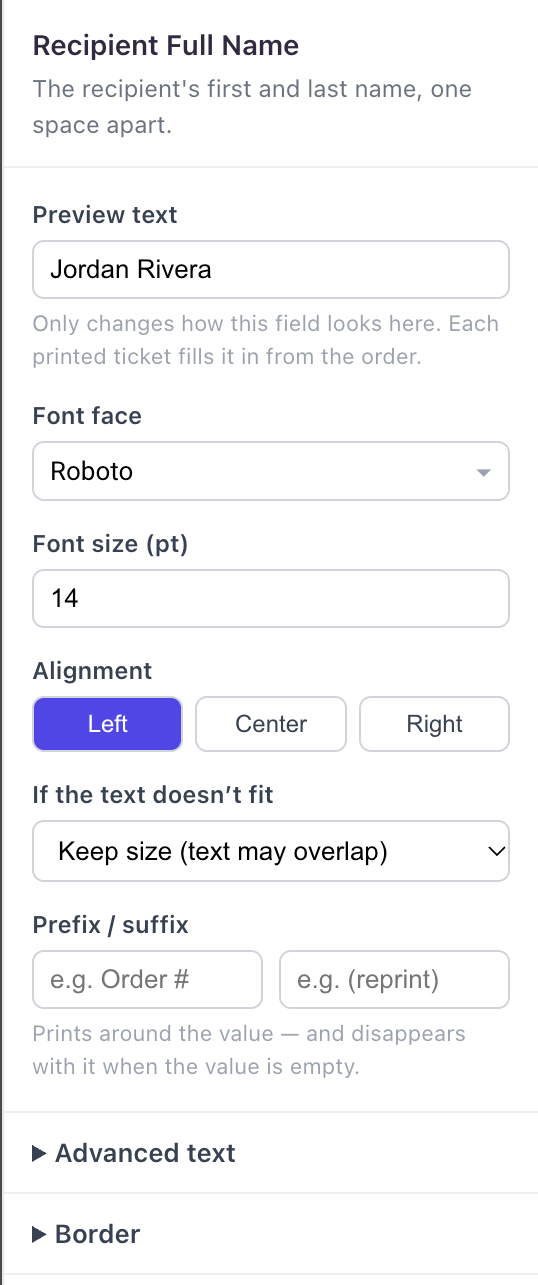
- Font face, Font size, and Alignment
- If the text doesn't fit: keep the size, shrink the text to fit, grow and push the fields below it down, or trim the end with "…"
- Prefix / suffix: text that prints before or after the value, like "Discount" before an amount. It's left off when the field is empty
- Advanced text: weight, color, spacing, text case, italic, underline, rotation, and opacity
- Border and Size & position
Shrink the text to fit works well for long names, addresses, and card messages. Your layout stays put, even on long orders.
Sections
A section is a frame that keeps a group of fields together. Fields inside it grow and push each other down, but never past the edge of the frame.
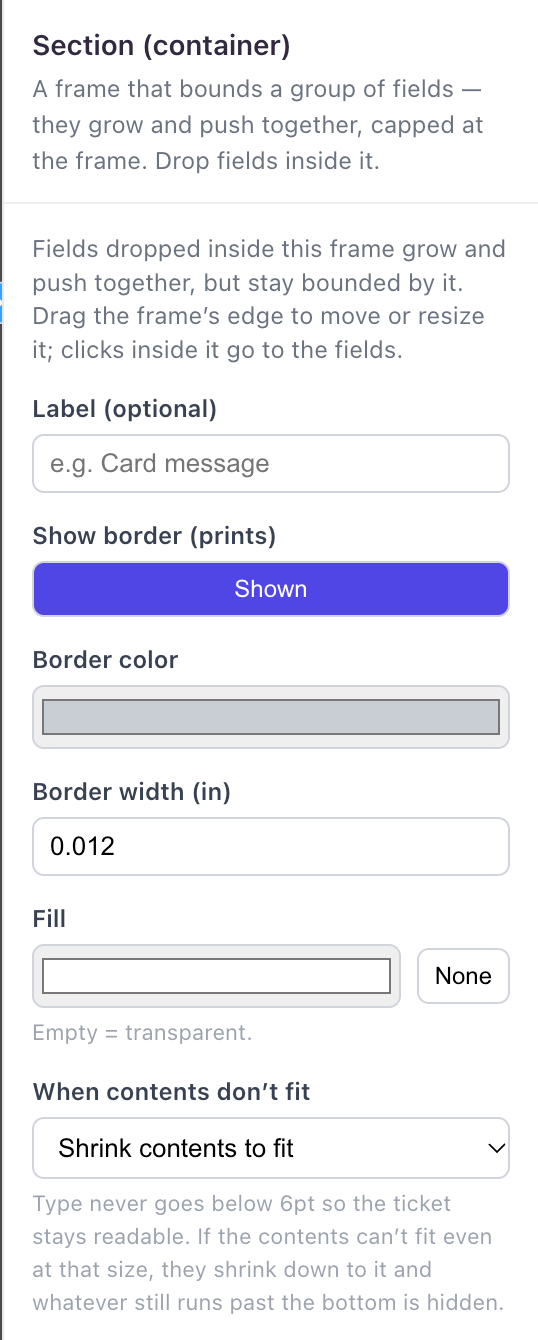
- Label: name the section so it's easier to find
- Show border: print a border around it
- When contents don't fit: shrink contents to fit, clip anything past the edge, or continue on another page
Line items table
Click the table to choose what it shows.
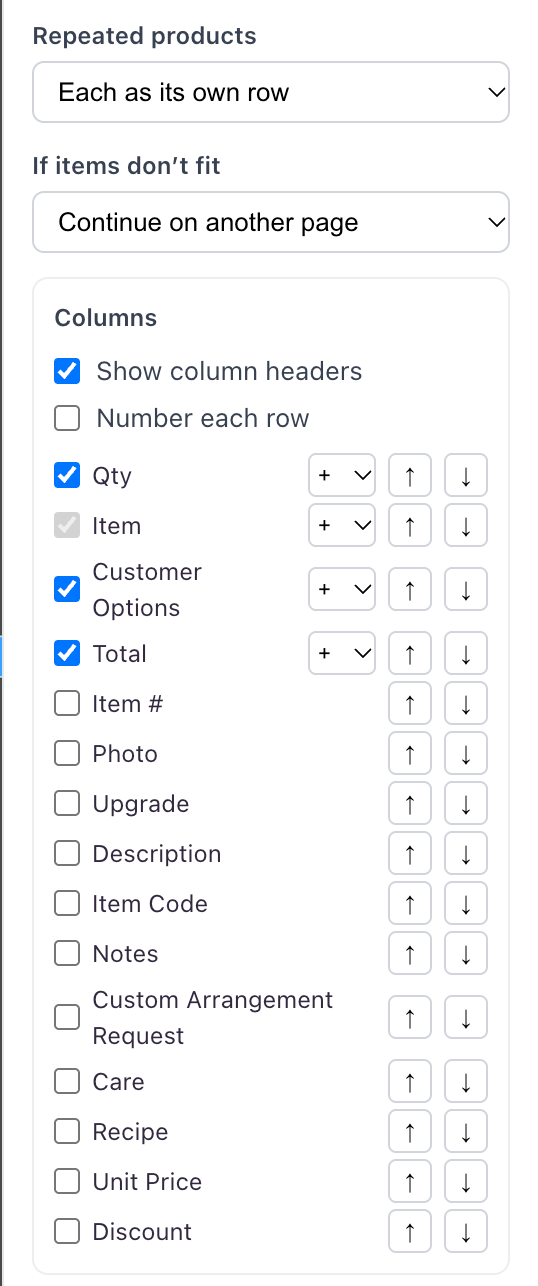
- Repeated products: show each item on its own row, or group identical products and combine the quantity
- If items don't fit: continue on another page, or show the first few plus "+N more"
- Columns: check the columns you want and use the arrows to reorder them. Use + to stack a detail, like notes or a recipe, inside another column
Preview your ticket
Click Preview to see your ticket filled in before you publish.

- Sample order: pick from sample orders, including a long recipient name, a pickup with no card message, and a 16-item order that runs onto more pages
- My example copy: see the sample text you entered while designing
- Order #: enter one of your own order numbers to see how it prints
Tips
- Set your paper size and margins before you add fields
- Use the undo and redo arrows at the top of the editor, or press Ctrl+Z
- Each field is styled on its own. You can't select several fields at once
- Many shops print a few test tickets before setting a new design as their default
Need help?
If you have questions, our Partner Support team is here to help.
Phone: (210) 405-5050
Email: support@bloomnation.com